It is a running record of the creative process. (Images are purposely degraded then compressed to help protect intellectual property.)
Saturday, May 13, 2006
simple overlaps
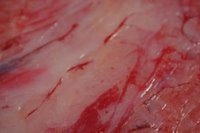
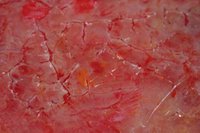
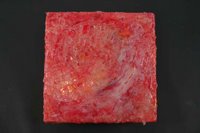
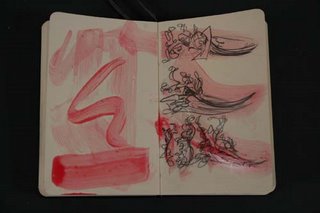
difficult to see in the photo.... but I am amazed at how just the overlap of the transparent acrylic paint (over the pencil lines) can create such a sense of depth and layering. It's most likely because the image is so simple that the overlap and transparency have the ability to be on an equally important ground; whereas if they image was very complex that overlap and transparency would be relegated to an "oh yea, that too" kind of status.
Additionally, I am really excited how the acrylic maintains it's appearance of fluidity even once dry. I think that it dries fast enough, and has the proper viscosity to allow the streaks and variations to remain visible (as a record of both the motion of the brushstroke and the evident liquid form of the the paint)
I have played with ink before and it's a bit too flat. The acrylic emultion stands up, away from the paper a little bit. I just might have to go back and make more of these, and investigate this technique further as a way to explore some of the dichotomies that actually lead to a third state of existence.
fluid/solid
transparent/opaque(overlap)
motion/stillness
I'm really glad that I've been able to realize a new way (for me) to use acrylic paint, and it has opened up more ways to make paintings, while still actually using paint.
Labels:
acrylic,
artandwater,
drawing,
emotion,
emotive,
expressive,
fluid,
line,
overlap,
paint,
painting,
transparent
"frozen" waves and water
why slides?
There are still schools, universities, colleges, residencies, gallery shows, competitions, awards, all sorts of things that require work submitted as slides. It really is stupid.
Kodak does not make slide projectors any more.
It seems that nearly everyone has a computer now. Or at least I don't know of anyone who actually owns a slide projector who does not also own a computer.
AND the wonderful things that can be done with digital media projectors is absolutely amazing!
What is especiallly confusing, is that ANY school still requires the submission of work in slide format, especially when most of the visiting artist presentations are given using a computer and a digital media projector.
Slides are expensive!!! I could mail you 20 slides and it would cost me about $10 for the mailing, about $20 for the slides (and it's about twice as much if I have to get duplicates made instead of just using the first run of photos...).
OR, I could mail you 20 images (or more) on a CD/DVD for about $2 (one buck for the disk, another dollar for the envelope and stamp)
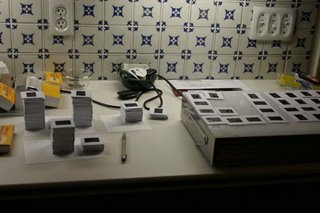
The art world at large, especially the academic art world, is further isolating itself from the greater world. If an artist does not care to share his/her work with others, then this point is moot. But, many artists are fooling themselves into thinking that they don't really care to have others see their work. 1% of the artists who say that are telling the truth, and 99% are complete liars!
Artists have almost always had a difficult time justifying their passion for art. "What good is art anyway? It's just decoration." is kind of an all too common comment. The continuous insistence on the use of slide just adds fuel to the fire by helping keep the art world seperated from the rest of the world. And, indeed, art becomes useless because it becomes invisible as it falls behind in the use of technology.
Additionally frustating is the large amount of artists using non-traditional media. Their work is happily accepted in digital format. So, then why must drawings, paintings, and sculpture be presented on slides?
Wouldn't a sculpture be better represented with a video? Video could be transferred to a DVD.
Do you really want to see 20 slides of a performance piece? Or, would you prefer to have a more complete sense of the work by viewing a DVD?
Universities have media projectors that can mimick slide projectors.
Let's take some of the expense out of sharing our art with the world. Allow us to use digital representation, so that artists' money can be spent on more important things, like creative materials (or rent, food, medical insurance)
some inspiration
just wanted to share some of the view that provided inspiration for my latest paintings (both in form and the play between transparency and overlap/opacity, but obviously not the color)
see if you can get a sense of the motion of the water, that same kind of motion that I've been working on with my art, both prints, oil and acrylic paintings
Tuesday, May 09, 2006
double decker P B & J
that last post was a bit serious, so I thought I'd share something lighter with you: my favorite sandwich in the world...
the double decker peanut butter and jelly sandwich!
I prefer creamy peanut butter and raspberry preserves. But, of course, chunky peanut butter and any kind of jelly will work.
The key to this sandwich is two things:
1. 3 slices of bread
2. placing the peanut butter on the first and third slices of bread.
use 3 slices of bread because it's a double decker sandwich, not two sandwiches smashed together. It's an alternating combination of bread, filling, bread, filling, bread.
I like to apply the peanut butter first. Spread some on two pieces of bread. Doing this first is best, because the little bit of peanut butter left on your knife is less likely to come off in the jelly jar than if you did it the other way around. Everything is kept separate until you want it to be combined.
After wiping the excess peanut butter from the knife, then I like to put jelly on the third piece of bread and make a normal PB&J sandwhich out of it and one of the peanut buttered pieces.
Here's the fun part. The part that makes me feel like a little kid...
On top of your "normal" PB&J sandwhich, you get to smear MORE jelly!
It's ok. You're mom won't yell at you, because you have an extra piece of bread with peanut butter that you can SLAP down on top of that mess (and make a double decker PB&J sandwhich). See, you're not a mess. You're a gourmet!
Subscribe to:
Posts (Atom)